Ventura Vexations
Published 3 years, 3 months pastI’ve been a bit over a month now on my new 14” MacBook Pro, and I have complaints. Not about the hardware, which is solid yet lightweight, super-quiet yet incredibly fast and powerful, long-lived on battery, and decent enough under the fingertips. Plus, all the keyboard keys Just Work™, unlike the MBP it replaced! So that’s nice.
No, my complaints are entirely about the user environment. At first I thought this was because I skipped directly from OS X 10.14 to macOS 13, and simply wasn’t used to How The Kids Do Things These Days®, but apparently I would’ve felt the same even if I’d kept current with OS updates. So I’m going to gripe here in hopes someone who knows more than me will have recommendations to ameliorate my annoyance.
DragThing Dismay
This isn’t on Apple, but still, it’s a huge loss for me. I know I already complained about the lack of DragThing, but I really, really do miss what it did for me. You never know what you’ve got ’til it’s gone, right? But let me be clear about exactly what it did for me, which so far as I can tell no macOS application does, nor does macOS itself.
The way I used DragThing was to have a long shelf down the right side of my monitor containing small-but-recognizable icons representing my most-used folders (home directory, Downloads, Documents, Applications, a few other folders) and a number of applications. It stayed there all the time, and the icons were always there whether or not the application was running.
When I launched, say, Firefox, then there would be a little indicator next to its application icon in DragThing to indicate it was running. When I quit Firefox, the indicator went away but the Firefox icon stayed. And also, if I launched an application that wasn’t in the DragThing shelf, it did not add an icon for that application to the shelf. (I used the Dock at the bottom of the screen to show me that.)
There are super-powered application switchers available for macOS, but as far as I’ve seen, they only list the applications actually running. Launch an application, its icon is added. Quit an application, its icon disappears. None of these switchers let me keep persistent static one-click shortcuts to launch a variety of applications and open commonly-used folders.
Dock Folder Disgruntlement
Now I’m on to macOS itself. Given the previous problem, the Dock is the only thing available to me, and I have gripes about it. One of the bigger ones is rooted in folders kept on the Dock, to the right of the bar that divides them from the application icons. When I click on them, I get a popup (wince) or a Stack (shudder) instead of them just opening the target folder in the Finder.
In the Before Times, I could create an alias to the folder and drop that in the Dock, the icon in the Dock would look like the target folder, and clicking on the alias opened the folder’s window. If I do that now, the click-to-open part works, but the aliases all look like blank text documents with tiny arrows. What the hell?
If I instead add actual folders (not aliases) to the Dock, holding down ⌥⌘ (option-command) when I click them does exactly what I want. Only, I don’t want to have to hold down modifier keys, especially when using the trackpad. I’ve mostly adapted to the key combo, but even on desktop I still sometimes click a folder and blink in irritation at the popup thingy for a second before remembering that things are stupider now.
Translucency Tribulation
The other problem with the Dock is that mine is too opaque. That’s because the nearly-transparent Finder menu bar was really not doing it for me, so acting on a helpful tip, I went and checked the “Reduce Transparency” option in the Accessibility settings. That fixed the menu bar nicely, but it also made the Dock opaque, which I didn’t actually want. I can pretty easily live with it, but I do wish I could make just the menu bar opaque (without having to resort to desktop wallpaper hacks, which I suspect do not do well with changes of display resolution).
Shortcut Stupidity
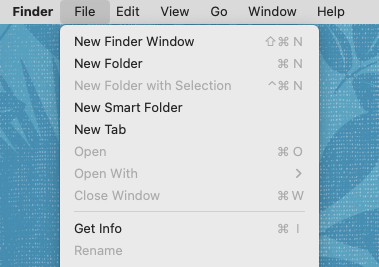
And while I’m on the subject of the menu bar: no matter the application or even the Finder itself, dropdown menus from the menu bar render the actions you can do in black and the actions you can’t do in washed-out gray. Cool. But also, all the keyboard shortcuts are now a washed-out gray, which I keep instinctively thinking means they’ve been disabled or something. They’re also a lot more difficult for my older eyes to pick out, and I have to flick my eyes back and forth to make sure a given keyboard shortcut corresponds to a thing I actually can do. Seriously, Apple, what the hell?
Trash Can Troubles
I used to have the Trash can on the desktop, down in the lower right corner, and now I guess I can’t. I vaguely recall this is something DragThing made possible, so maybe that’s another reason to gripe about the lack of it, but it’s still bananas to me that the Trash can is not there by default. I understand that I may be very old.
Preview Problems
On my old machine, Preview was probably the most rock-solid application on there. On the new machine, Preview occasionally hangs on closing heavily-commented PDFs when I choose not to save changes. I can force-quit it and so far haven’t experienced any data corruption, but it’s still annoying.
Those are the things that have stood out the most to me about Ventura. How about you? What bothers you about your operating system (whichever one that is) and how would you like to see it fixed?
Oh, and I’ll follow this up soon with a post about what I like in Ventura, because it’s not all frowns and grumbles.


